INTRODUCTION
In this lab section, one of the task will be chosen for the stunt recording, in which case I have chosen Task A: Position Control to conduct the robot flip motion.
LAB TASKS
Flip
In this lab section, Task A: Position Control is selected, where a robot flip will be implemented.
Flip Implementation
Firstly, the command case FLIP in the Arduino code is created to realize the flip action, where the variable flip_on is used to control the flip motion in the main loop.
And in the main loop of the Arduino code, the function flip() is implemented to start this action, and getFlipRecord(flip_sample_num) can record the distance and PWM data, where the flip_sample_num will not exceed the value of max_flip_num, which is 2000.
In the flip() function, the state machine is implemented to control the flip stunt.
When flip_state is equal to 0, the robot will enter full speed state to approach the wall. Because sometime the robor might not detect the distance correctly, it will keep moving. Therefore, I have added the timeout condition to make it stop after being in this state for 5 seconds. State 1 is to record the start time of the flip. Furthermore, State 2, 3, 4 is going backwards, stopping and going backwards again. And finally, it will stop completely.
And the following code is used to record the data:
In the Jupyter Lab, the command ble.send_command(CMD.FLIP, "1000") and ble.send_command(CMD.START_RECORD, "") are implemented to start this action, where the set_distance is 1000 to avoid crashing into the wall.
Stunt recording
Below is three successful stunts of the robot flip:
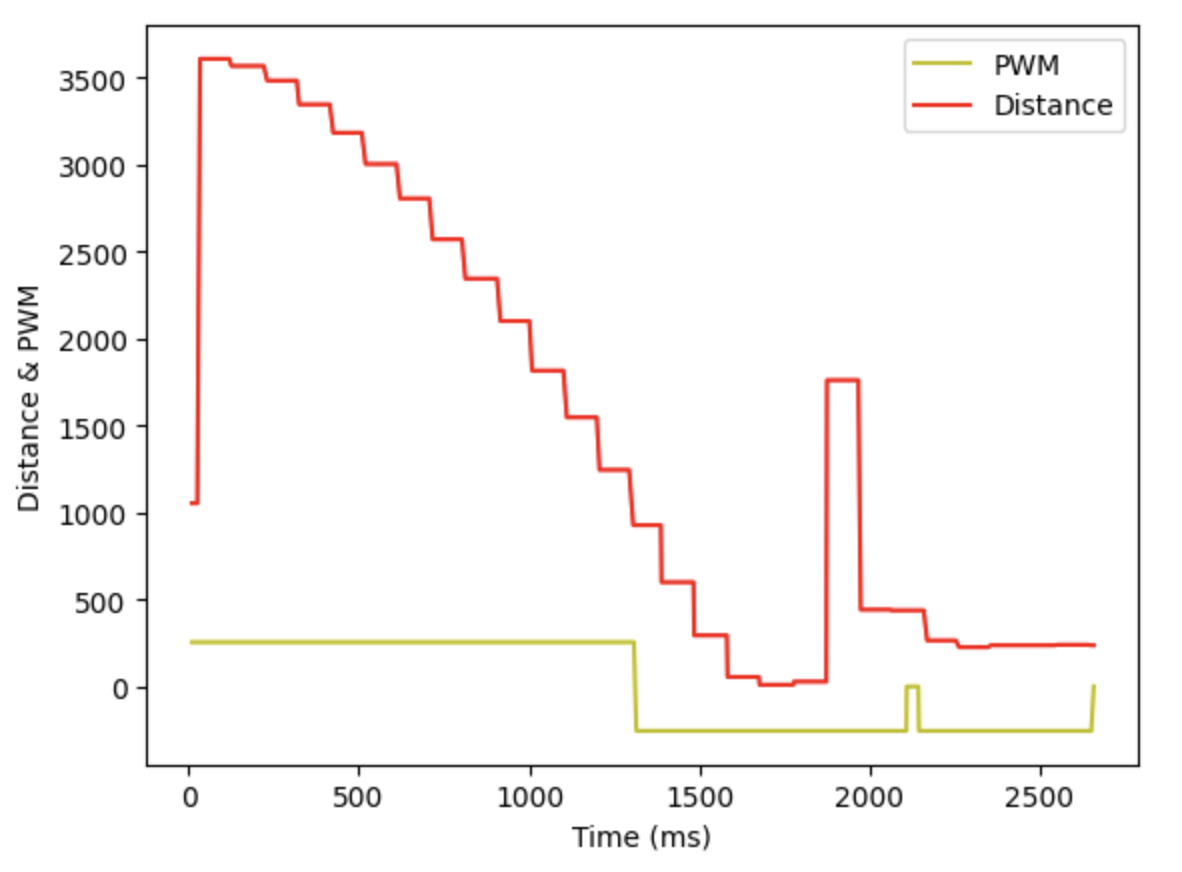
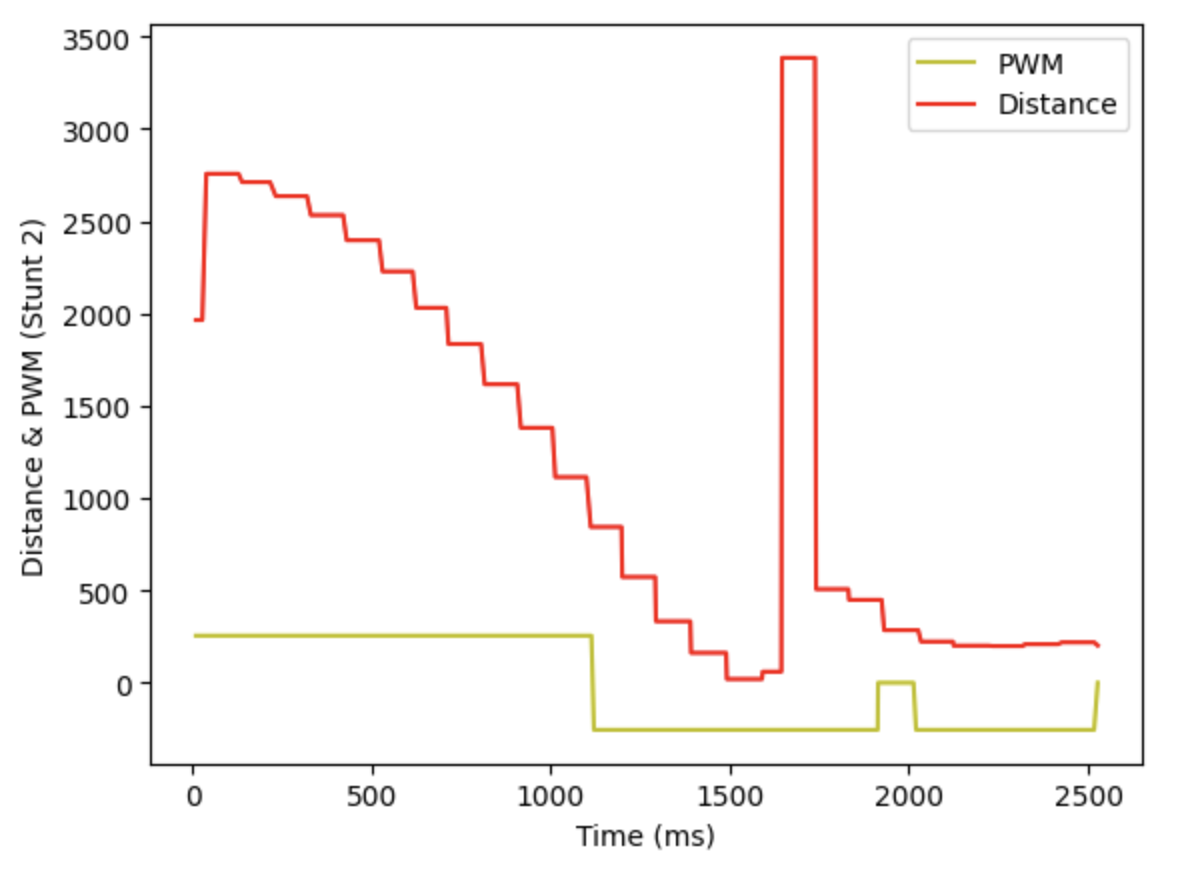
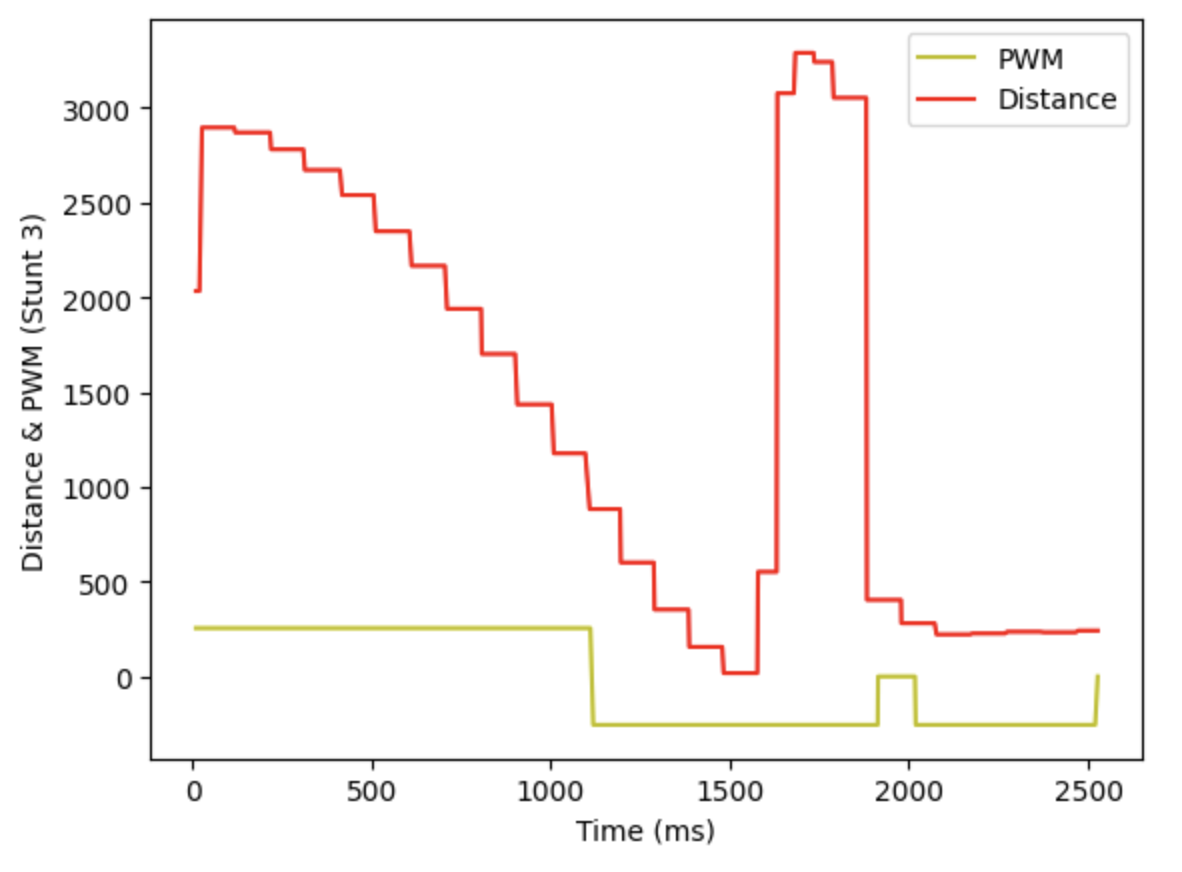
To obtain the flip data, the case SENDING_FLIP_DATA is created to send the records through the BLE channel to the laptop. It can be observed that the motors are set to start the flip when the distance to the wall is less than 1000ms, where the motors are stopped for a short duration within the backward period to realize this flip stunt.
The following program is created to transfer the record flip data to the laptop through the BLE channel.
Furthermore, with the figure plot program, the time vs PWM and time vs distance diagrams can be drawn according to those three successful stunts.


DISCUSSION
In conclusion, this lab section is to select one task from the lab instruction and record three successful stunts. Moreover, the flip code has been improved with state machine and the timeout function is added to prevent the robot from keeping moving.
